Farine

Crazy for Bread

  • Home
  • About
    • FAQ
  • Recipes
  • Resources
    • BreadCrumbs
    • Other Bread Sites
    • The Grain Gathering
  • Artisans
You are here: Home / blog

Meet the Baker: Noah Elbers

Related post: Noah Elbers’ Maple-Oatmeal Bread
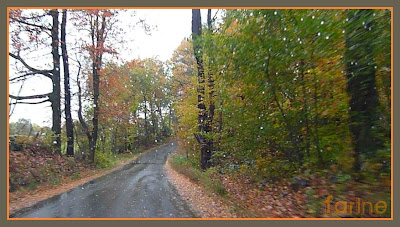
As we were driving home after a visit to Noah’s bakery in New Hampshire, I was thinking that if I could have another life and start all over again and be a professional baker, then I would want to start my career at Orchard Hill Breadworks. Not only is it located deep in the woods of New Hampshire which are gorgeous year-round and especially in the fall when we were there (sorry I can’t show you more pictures than the ones I took from the car as it rained all the time we were there)…

…but I have never seen such a jolly team of bakers as Noah and his employees. Kurt, one of the full-time workers, was away on a trip but I met the two other permanent members of the team…

…Dave Cody (who used to work with kids with behavorial problems)…

…and Brendan Smith (who started as a home baker when he was working in a consulting firm specializing in renewable energy)…

…as well as Ben Ewing who was replacing Kurt on a temporary basis and who, by trade, is a forester. All three love biking (as does Noah) and I have the feeling that they have no problem finding something to talk about as they work. Dave and Brendan live a mile away on the same road as the bakery. They bike to work most of the time. Every house along the road has a wood stove and they say the air smells delicious as they ride by. They clearly love it here and Noah enjoys the interaction with his employees. A small detail (which I found it endearing): Noah’s family has a flock of 50 laying hens and whenever these hens lay, his bakers get free eggs. Now that has nothing to do with baking but it certainly fosters a feeling of belonging…

I am always amazed at and delighted with the diversity of the paths which lead to bread. Noah himself started baking as a teenager when a next-door neighbor built a wood-fire clay oven and recruited him to help make bread. He loved the essential nature of the elements involved, fire and earth, especially in the winter. He enjoyed seeing the dough rise in baskets. He also loved the bread which was excellent. But he didn’t see baking as a career. By the time he graduated high school he had pretty much ruled out college and decided to stay home and help his Dad run his farm (he has an apple orchard). The baking neighbor no longer lived next door. They had remained friends however and one day he convinced Noah that he needed to build his own outdoor oven, so that he could bake breads on weekends. The rest is history (or rather a story told here on the bakery’s website).

Dave, Brendan and Ben – soon joined by Noah – were shaping the 6-grain bread when I showed up in early morning. As can be seen from the video below, the bakery is a regular beehive:

Noah says he has no illusion about being a master baker. Bread isn’t a religion for him and he doesn’t live through bread. He likes the idea of leaving space within himself for other interests and hasn’t devoted attention to developing a signature bread nearly as much as to trying to make a living for himself, his wife and his two kids. He describes himself as the type of baker who has given a lot of thought to the bread-baking process, tried his best to learn and observe as he went along (he never went for formal training and at the beginning mostly learned from books such as The Bread Builders by Alan Scott as well as from skilled friends) and ends many a shift with a puzzled look on his face. He finds that the complexities of baking are at times well explained by science and at other times simply unexplainable. But he goes with what works for him and obviously cares deeply about the quality of his products.
Most of Noah’s breads are naturally leavened except for a couple of sweet breads which benefit from an addition of poolish. He maintains a liquid levain (at 90% hydration) which is fed every 12 hours with a mix of 90% all-purpose flour and 10% freshly cracked rye (he finds that rye adds complexity and takes away some of the more acidic flavors). He uses an old refurbished mixer which is gentle on the dough.
The piece of equipment Noah takes the most delight in is however his oven. Having baked for years, first in an outdoor clay oven (despite the rustic appeal, he certainly doesn’t wax nostalgic about the days he had to carry trays of proofed loaves outside in all kinds of weather) then in an Alan Scott brick oven (it could only hold 30 to 40 loaves at a time, and no more than 500 loaves in a day’s bake which would take 14 hours to complete), he clearly enjoys his gorgeous Llopis revolving brick oven: it allows him to bake more than 900 loaves in little more than 8 hours.

There are three bake cycles per week (from preferment mixing to bread delivery), each one producing on average 1,000 lbs of dough (total dough production will reach 155,000 lbs this year). Noah is committed to making weekly not only a 100% whole-wheat loaf but also another whole-grain one which changes regularly (rye, Russian rye, whole-spelt with rice, oats and millet, currant rye, etc.) At each bake he also makes a country campagne with 40% whole grain. Although he himself enjoys whole-grain breads, he acknowledges readily that they represent a very small percentage of the total production.
Now for those among you who are passionate bakers and love to delve into the specifics, here is a bit of technical information:
  • Noah doesn’t preshape, ever. He has done a lot of side by side comparison and failed to establish that it made a difference
  • All his doughs are pretty well hydrated but not superwet (at least 70% for most white doughs and closer to 85% for the whole-wheat), so that they relax quickly
  • Although most of the white flour he uses (hard red winter wheat) comes from Quebec’s La Milanaise, Noah mixes all his preferments with Kansas Heartland Mill flour which, in his experience, seems to have a better tolerance for long fermentation. He regularly uses a blend of 70% Milanaise and 30% Heartland.
  • For the whole wheat, he uses exclusively La Milanaise flour
  • He fires up the oven while mixing the bread (which means that the oven isn’t fired every day). When baking, by the time the oven floor is completely loaded with bread, the first loaves are finished and fresh loaves are immediately put in their place. The oven is never less than 80% full.
  • The ceiling of the oven is much higher than in most deck ovens. Due to the high volume of very humid air (coming from the baking loaves), there is no need to add steam
  • Noah uses poolish (together with levain) to give the dough an extra boost whenever it contains a lot of sweetener or milk
Noah also makes specialty breads: one of the most popular is cracked pepper & parmesan but I never made it up to the bakery on a day when this bread is on. So I can’t say how it tastes. But the first time I visited the bakery, Noah had just made maple-oat bread. I bought a couple of loaves and brought them back home. It was love at first bite!
The bread is so good that I decided on the spot that I had to interview Noah for Farine and beg him for the formula. He kindly acceded to both requests and I now have the great pleasure of introducing a marvelous specialty bread: Noah Elbers’ Maple-Oatmeal Bread.

Share this:

  • Facebook
  • Pinterest
  • Twitter
  • Email
  • Print

January 5, 2011 · Filed Under: Artisans, Videos · 3 Comments

Noah Elber’s Maple-Oatmeal Bread


Noah Elbers’s Maple-Oatmeal Bread (as sold at the bakery)

Related post: Meet the Baker: Noah Elbers

Since discovering Noah Elbers‘s Maple-Oatmeal Bread (and before I learned how to make it myself), I have bought maple-oatmeal breads from other bakeries, including in Vermont. I have yet to find one that can compare. I even remember being so put off by one of these other loaves that I cut it into small pieces, took it to the lake and fed it to the ducks (who, having no basis for comparison, seemed to like it way more than we did). It is hard to describe the flavor of Noah’s maple-oatmeal bread other than to say that it is barely sweet, supremely delicate and very, very addictive.


Noah Elbers’s maple-oatmeal bread (as sold at the bakery)

I watched the making of this bread from the mixing of the dough through the shaping but since it was going to be baked much later (after retarding) and we needed to drive back home, I didn’t see the baking. 
Here is Noah’s formula in baker’s percentages:
60% all-purpose flour
20% whole-wheat flour (+ 10% each in starter and in poolish) = 100%
20% cooked steel-cut oatmeal
44% water
2.2% salt
16% pure maple syrup
20% liquid starter
20% poolish (made with a pinch of instant yeast)
All liquids together = 75%
Pointers:
  • Starter and poolish: 12-hour fermentation at 75°F/24°C
  • Oatmeal: Scale equal weight of oats and water. Boil the water, pour it over the oats, stir, cover and bake in the oven at a temperature of about 410°F/210°C for 40 minutes. The oats absorb all the water and by the time they are mixed with the maple syrup, they form an “oat chunk” rather than oatmeal. The water used to cook the oats is not included in the total water percentage
  • Autolyse: 20 to 30 minutes
  • Desired dough temperature: 77 to 78°F/25 to 26°C
  • Bulk fermentation: 2.5 hours with 5 folds after 50 minutes and 5 folds again after 40 minutes
  • No pre-shaping
  • Scaling: at 24 ounces/680 g
  • Shaping: as a boule or as an oval
  • Proofing: 45 minutes on the floor (at least 1 hour at home where the temperature is probably lower) then 14 to 15 hours in the retarder with the cover on
  • Baking: at 400-415°F/204-213°C for 35-40 minutes with lots of steam at the beginning

The first time I made the bread, I miscalculated the amounts (not surprisingly, since I truly am mathematically challenged) and used way too much water. I tried to rescue the dough but to no avail. It spread so much on the parchment paper that I thought I had totally messed up and would for sure get another treat for the ducks. What I got instead was a weird looking but delicious maple-oatmeal ciabatta which we found particularly enjoyable at breakfast. Before we tasted it, I was so mad at having messed up that I didn’t take any pictures but I should have: the bread was rather too dark for a ciabatta and a bit flatter too but the crumb was perfect, delectable and open. I think I will actually make it again…
The second time was at my kids’ house in the Northwest. Having no access to baskets of any kind, I shaped the dough as a boule and proofed it directly on a couche. It rose beautifully in the oven and even though it again turned out darker than I would have liked (the oven was way too hot), the taste was almost spot on.
However since I didn’t want to end up with a ciabatta again and since I had no proofing baskets, I had reduced the amount of water to make sure the dough wouldn’t be too slack. The end result is that I got a tighter crumb than the one I was shooting for.
(By the way, I am sorry for the poor quality of these two pictures. It was very dark out and raining and nowhere in the house could I get enough of the natural light I would have liked to work with.)


Ingredients:
  • 447 g all-purpose unbleached flour
  • 151 g whole-wheat flour
  • 151 g steel-cut oatmeal, cooked as described above
  • 328 g water
  • 151 g liquid starter
  • 151 g poolish
  • 121 g pure maple syrup
  • 16 g salt
Method:
Note 1: The starter has to be fed and the poolish mixed the night before
Note 2: Poolish recipe: 100g flour + 1 pinch of instant yeast + 100g water. Mix well and leave to ferment overnight, preferably at warmish room temperature (above 70°F/21°C if possible)
Note 3: Noah retards this bread for 14 to 15 hours. I didn’t do it (there was no room in the refrigerator) and even though the bread still turned out quite tasty, next time I will retard it and see if the flavor becomes even more complex (it should). Also, since I had no access to a mixer, I mixed the dough by hand.
  1. I mixed all the ingredients except the salt in a big bowl and let the dough rest for 30minutes, covered
  2. I mixed everything again to medium soft consistency, covered the bowl (dough temperature by then was 75°F/24°C ) and applied the 5-folds regimen recommended by Noah (see pointers above). Total bulk fermentation time was three hours at room temperature (72°F/22°C)
  3. I skipped pre-shaping, shaped the whole dough as one single boule and let it proof for two hours covered, on cornmeal-dusted parchment paper (I had no semolina), again at room temperature
  4. I pre-heated the oven at 475°F/246°C half-an-hour prior to baking time, after placing an old metal pan at the bottom and a half-sheet on the middle rack (my kids have no baking stone in their oven)
  5. I slid the boule with the parchment paper underneath on the half-sheet, quickly poured one cup of water in the metal pan and closed the door
  6. I immediately lowered the oven temperature to 450°F/232°C and let the bread bake for 25 minutes without opening the door
  7. I then rotated the bread, lowered the oven temperature to 420°F/216°C and continued the baking for another 20 minutes.
As indicated above and obvious from the picture, I started with an oven which was way too hot and I didn’t lower the temperature enough afterwards. Oh, well, that’s how we learn, isn’t it? Noah bakes this bread at 415-425°F/213-218°C and, according to him, even at that lower temperature it colors quickly, much like it would in a hotter oven, maybe because of all the steam coming off the baking loaves or the materials his oven is made of or the heat or a combination of all these factors. Basically the home baker will have to find the temperature that works the best in his/her oven for this bread. But even if it comes out a bit too dark for your taste at first, I bet you will love it!

Noah Elber’s Maple-Oatmeal Bread goes to Susan’s Wild Yeast Blog for this week’s issue of Yeastspotting.

Share this:

  • Facebook
  • Pinterest
  • Twitter
  • Email
  • Print

January 5, 2011 · Filed Under: Breads, Breads made with starter, Recipes, Videos, Yeasted breads · 18 Comments

Happy Holidays to All!

Share this:

  • Facebook
  • Pinterest
  • Twitter
  • Email
  • Print

http://www.farine-mc.com/2010/12/happy-holidays-to-a.html

December 25, 2010 · Filed Under: Uncategorized · 4 Comments

Meet Solange Couve, Artisan Jam-Maker

Related post: Pear-Chestnut Confit
I don’t often write about non-bread magic but I must share with you this visit to Solange Couve, jam-maker extraordinaire who lives with her husband Stéphane (whom we didn’t get to meet as he was away visiting his mother), her dog Victor and her two cats, Lulu and Lily, in a remote corner of the Ardèche department in south-central France. From the highway it takes about 45 minutes and hundreds of steep curves on very narrow roads (we were glad to be traveling on a holiday when traffic was sparse) to reach the farm.
New vistas opened up with each turn in the road and if it had been possible to stop more often (alas, opportunities to just get off the road and admire the landscape were few and far between), I could have taken dozens of pictures, all different. It’s easy to understand why so many of my French friends rave about vacationing in the Ardèche backcountry.
Like Emerald City in the Wizard of Oz, the farm is literally located at the end of the road.
The farmhouse has remained pretty much as it was when Solange and her husband decided to make it their permanent home 27 years ago. The sink has remained the same, the doors and walls were repainted in their original colors and the volumes were not altered.
Solange and Stéphane happened upon the farm one day while traveling in the area and fell in love with it at first sight. It then belonged to two elderly sisters who, as it turned out, were only too glad to sell and move away. The surrounding land had been left idle for 20 years although some of it was being farmed by neighbors. The couple led a busy life in Paris where Stéphane was a dentist with a thriving practice and Solange, who was a real estate agent, spent her week commuting from the capital to central France and to Corsica. In other words, they mostly saw their new house as a destination point for downtime.
After a few years however the pull of the farm became too strong to resist. Stéphane sold his practice and bought a new one in the Rhone valley, about 45 minutes away. As for Solange, she decided to forego real estate and to become a farmer. Now for that dream to become reality, two things needed to happen: the land had to be cleared up (a process which involved an enormous amount of manual labor) and Solange needed to acquire notions of agriculture. Not a woman to be easily deterred, she enrolled in an agricultural studies program in Valence and spent a year learning everything there was to know about trees: how to plant and prune them, how to take care of them, etc. When that was done, she spent another year learning about food-processing to find out all she could about sugar chemistry. An overkill, she soon realized, for someone whose only aspiration was to learn how to make jam properly. But Solange is nothing if not thorough and she forged ahead.
Meanwhile the land had been cleared and planted with close to 4 acres of fruit-trees. Since the Ardèche is raspberry-heaven, Solange also planted 2.5 acres of raspberry bushes as well as red and black currant bushes. For the first 10 years, she produced on average 6 tons of raspberries a year and sold them fresh to the local cooperative. Then the raspberry bushes were hit by some illness and had to be ripped out. She decided to diversify.
Using no other ingredients than fruit (pears, apricots, peaches, quinces, berries, etc.) from her land and sugar, she started producing more than 5 tons of jam a year which she sold mostly to luxury hotels and restaurants and to high-end grocery stores and bakeries as well as to fruit and vegetable markets which offer a small artisanal product section.
Since she had kept the chestnut-trees (the Ardèche is famous for its chestnuts) which were on the property when they bought it, she embarked on a trial-and-error learning process which taught her how to turn her chestnuts into delicious marrons glacés (candied chestnuts), crème de marrons (chestnut spread) and purée de marrons (chestnut purée). She also learned how to make pear-chestnut confit, an exquisite concoction which can be served with a brioche as a light dessert at the end of a holiday meal or poured over fromage blanc (soft curd cheese). As soon as she mentioned it over the phone, I knew I wanted to learn how to make it and report on it on the blog (after all, it could tempt you to make a brioche to go with it!).
Today Solange is semi-retired. She has kept her workshop (located about 2 miles away from the farm) but she only works for a few luxury hotels and restaurants on the Côte d’Azur and in the Alps as well as for family and friends. She still makes marrons glacés and other chestnut delicacies, including the confit, but she no longer sells them (too much work). I wish I could describe in details the lunch and dinner ardéchois she prepared for us and the extraordinary breakfast that awaited us in the morning featuring grape juice from her own grapes, no less (they grow on the vine that shades the big table just outside the kitchen door), but it would be off subject. Suffice it to say that Solange loves to cook and that her imagination is bottomless when it comes to extracting as much flavor as possible from the fruit and vegetables she grows on her land. We were awed!

Share this:

  • Facebook
  • Pinterest
  • Twitter
  • Email
  • Print

December 12, 2010 · Filed Under: Artisans · 7 Comments

Pear-Chestnut Confit

Related story: Meet Solange Couve, Artisan Jam-Maker

Chestnuts are abundant in the Ardèche where they are used in a variety of dishes, some sweet and some savory, and even in bread. To make this confit, Solange uses chestnuts from her own chestnut-trees.
She also uses pears from her orchard (she only grows Williams pears). The ones she uses in this particular dish are the last of the season and she has saved them for the demo. 2010 hasn’t been a great year for pears: last year the pear-trees yielded a huge crop of very big pears but this year, they struggled to produce fewer and much smaller fruit. Still the pears seem marvelously fragrant and juicy to me.
For this recipe, the pears are first peeled…
… then cooked in syrup until they become translucent.

As for the chestnuts, they are cut horizontally in a circle, then boiled briefly to slightly loosen their two layers of skin. Once peeled, they are cooked in boiling water before being added to the pears. Preserved chestnuts in syrup can also be used, whether home-made or store-bought.

Solange uses a special knife to cut through the chestnuts but as demonstrated in the video below, a regular paring knife can also be used.Previously, when she was processing her chestnuts for commercial purposes, she had them peeled in the village by an artisan who uses a less labor-intensive technique: he places the chestnuts inside a rotating cylinder perforated with many small holes and uses a flame-thrower. The flames lick the outside of the cylinder, burning away most of the skins. The chestnuts are next dipped in water then placed on a rolling mat where the remaining skins are removed by hand. The perfect ones can be used whenever a recipe calls for whole chestnuts whereas the other ones are puréed and used in other recipes.
Solange says that it is best to let fresh chestnuts dry out a little as they are easier to peel if they have shrunk a little. Store-bought ones are usually somewhat dry already, so this step can be skipped. Since the skins are easier to remove when the chestnuts are hot, it is almost guaranteed to be a challenging exercise and caution is de rigueur. If one isn’t really partial to burned fingers, it is best to use chestnuts preserved in syrup as a less hazardous alternative.
Ingredients:
1 liter of water
400 g crystallized sugar
10 pears
10 big fat chestnuts (or their equivalent in broken pieces)
1 vanilla bean (from Tahiti if available)
Method:
  1. Peel and cook the chestnuts as described above. Solange cautions that the chestnuts need to be peeled while still hot as their skin starts to stick again when they cool down.
  2. Heat water in a medium-size wide and shallow pot (to facilitate evaporation) and add the sugar
  3. Slice open the vanilla bean and scrape the tiny grains into the syrup, then add the two halves of the vanilla bean to the pan
  4. While the syrup is boiling, peel and core the pears and cut them in quarters
  5. Plunge them delicately into the boiling syrup and let them simmer. Refrain from handling them as they cook. To avoid breaking them, do not flip them over
  6. When the pears are translucent, gently add the chestnuts with some of their cooking water and let the syrup thicken again
  7. Pour into jars when done. The confit will keep for a couple of weeks in the fridge. To extend its shelf life, it is imperative to sterilize the jars, a precaution that Solange takes systematically. She places all her jars in a big pot, covers them with cold water, then bring the water to a boil and lets the whole thing boil at 176°F/89°C for 15 minutes. None of her jars has ever spoiled.
Unfortunately my version of iMovie doesn’t allow me to add subtitles or I would have done so. But I can at least tell you what Solange is saying in this video clip (and please excuse my use of the French word “translucide” for “translucent” in the spoken dialogue. After two weeks of complete French immersion, I clearly had a hard time switching my aging neurones to English!).
  • When adding the pears to the syrup, make sure they are completely immersed and let them simmer
  • When preparing the chestnuts for peeling, cut through both skins all around. It is a bit hard to do but but when cut that way, both skins loosen simultaneously in boiling water.
  • Using a chestnut knife makes cutting the chestnuts in a circle a bit easier but a regular paring knife can be used as well
  • It doesn’t matter if the cut penetrates the flesh of the chestnut
  • After peeling, the chestnuts need to be cooked before they can be added to the pears
  • Add some of the chestnut cooking water to the syrup in the pear pan, so that it can thicken again without caramelizing
  • It doesn’t matter if the chestnuts crumble when added to the pears. In fact if using preserved chestnuts you probably want to break them a bit at this point.

Share this:

  • Facebook
  • Pinterest
  • Twitter
  • Email
  • Print

December 12, 2010 · Filed Under: Desserts & Sweets, Recipes · 3 Comments

  • « Previous Page
  • 1
  • …
  • 50
  • 51
  • 52
  • 53
  • 54
  • …
  • 81
  • Next Page »

Hello!

MC-Profile- 2013 - DSC_0934

My name is MC: formerly a translator,  now a serious home baker and a blogger. If you like real bread and love to meet other bakers, you are in the right place. Come on in...

Learn more →

  • Email
  • Facebook
  • Instagram
  • Pinterest
  • RSS
  • Twitter

Don’t want to miss a post?

Subscribe to Farine via email

Archives

Categories

Copyright © 2025 Farine · Design by Design Chicky Log in