Farine

Crazy for Bread

  • Home
  • About
    • FAQ
  • Recipes
  • Resources
    • BreadCrumbs
    • Other Bread Sites
    • The Grain Gathering
  • Artisans

Pondering Preferments

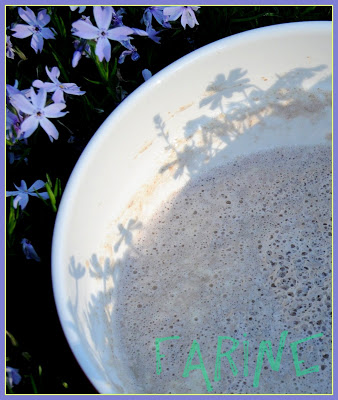
A chickpea levain I once made for a Cretan spiced bread

I am a huge whole grains fan, so even though I loved the Whole Grains Workshop I attended last April at the San Francisco Baking Institute, I was dismayed to learn, pretty much on the first day, that since specialty flours (i.e. any flour which is not wheat) are weak by nature and since fermentation weakens them further, it is actually better to use them in preferments than in the final dough.
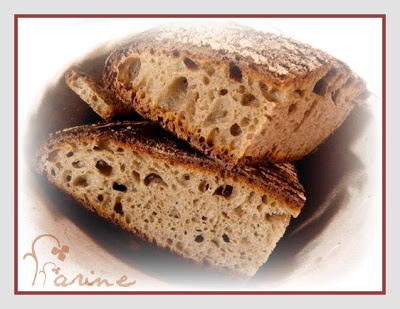
The baker is thus able to vary the flavor profiles while still using more regular bread flour in the final dough (thus bringing some of the strength back to it). It certainly works very well taste-wise. While at SFBI, I sampled many breads made with specialty flour preferments – as then student Safa Hemzé was experimenting with various flours – and the range of flavors was enormous. For an article on Safa’s work, click here.
The pictures below were taken by me at SFBI in January during an informal bread tasting session. The breads were all made by Safa.


I asked Safa about the meaning of this 20% figure and here is what he kindly wrote back: “The 20% refers to the amount of starter I used in each formulation. For example, 100% flour, 65% water, 2,2 % salt, 20% starter, .2% yeast (optional if retarding overnight or long final proofing). You can also add some additional “ancient flour” if you wish. Note that the total amount of non-gluten flour should remain under 15% in your total formulation”.
Although I loved the flavors these various preferments brought to each bread, I don’t think that the nutritional benefits of putting most of the specialty flour in the preferment are quite the same as they would be if more of the ancient grain flour was used in the final dough together with more whole grain flour instead of more regular bread flour.
Of course using a preferment is in itself a healthful choice. As Andrew Whitley writes in Bread Matters, a passionate plea for slow bread, “research has recently revealed that making yeasted breads quickly may not leave time for important changes to take place. For instance, fermenting dough for six hours as opposed to 30 minutes removes around 80 per cent of a potentially carcinogenic substance called acrylamide that is found in bread crusts, and long yeast fermentations conserve the highest levels of B vitamins in dough (48 per cent of vitamin B1 is lost in rapidly made white bread”.
Using a sourdough starter may even be better than just using a poolish or a sponge. Whitley goes on to write in another chapter, “lactic acid bacteria play a part in neutralising substances in wheat flour that can limit nutrient availability to human consumers”. 
He explains that “the bran contains considerable amount of phytic acid, which inhibits the absorption of these valuable minerals and trace elements” and that, according to a recent French study, “the action of lactic acid bacteria in sourdough fermentations improves the nutritional quality of wheat bread by reducing the amount of phytate” whereas “simple fermentation with yeast produced less than half the quantity of soluble (available) magnesium at the end of a four-hour period compared with the sourdough”.
So far so good! We have the great taste and some nutritional benefits (the nutrients present in the specialty and/or whole flour plus the outcome of the chemical activity at work in the prefermentation), but can we do better?
After all, as Beatrice Ojakangas puts it in Great Whole Grain Breads, a well-documented book first published in 1984 which is full of interesting and out-of-the-ordinary recipes, “bulk for bulk, whole grain breads have about half the calories of traditional breads, supply the most preferable plant protein, and offer valuable fiber to the diet”. 
Couldn’t we have our whole grain and specialty flour flavors and eat them too?
I don’t know but I mean to try and find some answers.
You know how some passionate cooks or bakers set themselves challenges, like making of all the recipes in Mastering the Art of French Cooking or baking all of the bread formulas in the Bread Maker’s Apprentice? Well, since I’d like to find out whether or not other techniques would make it possible to use more whole grains in more delicious breads, the (limited, I’ll admit it) challenge I am setting to myself is to try and master the master formula detailed by Peter Reinhart in Whole Grain Breads.
Why this particular one?

  • Because my first brush with that technique was with a derivative method developed by Nancy Baggett in Kneadlessly Simple (a book I reviewed here). I used it to make a 100% whole wheat loaf and I never made or ate a better 100% whole wheat bread (for some info on my experience making that bread, click here and go to bottom of post); Baggett acknowledges her debt to Reinhart, so I’d like to see what Reinhart’s original idea was;
  • Because we liked what I have already baked from the Reinhart’s book, such as the 100 % whole grain multigrain baguettes and I wouldn’t mind getting a firm foundation as to the technique before trying my hand at some of his other recipes (although one of his mashes and his whole wheat levain are sitting on the kitchen counter right now, waiting to be made into one of his mash breads) but I am pretty much proceeding by trial-and-error with that bread since it is a mixture of his ideas and my own and I’d like to be more methodical;
  • Because although I adore crunchy, chewy, holey-crumby baguettes and many other mostly white breads, I also love dense loaves (so does my son-in-law, so that makes two of us), a taste that isn’t not always shared by my under-20 descendants. I wouldn’t mind seducing their palate with other flours in such a way that they wouldn’t even realize they were eating “healthfully”, a word which, for whatever reason, seems less than compelling to their young ears… And I’ll be the first to admit that it is absolutely useless to put more “good-for-you” flours in the bread if it doesn’t get eaten;
  • Because my eyes have a tendency to glaze over when I try to read the 75 pages or so that lead up to the master formula in Reinhard’s book and because I have yet to follow any recipe faithfully. I’ll have to if I want to master the technique. So I will both read the introduction as carefully as Reinhart begs us to (and I will try not to do that at night when nap attacks are more likely) and follow his instructions to the letter. That’s the promise and the challenge.

As I am currently on an assignment (nothing to do with bread, alas), I can’t promise it will be immediate and even hesitate to set a timeframe. But I promise that it will happen and that I will keep you posted. Meanwhile I’ll keep on baking in my spare time ! Please share your thoughts with me as to the quandary between better taste and better nutrition. 

Share this:

  • Facebook
  • Pinterest
  • Twitter
  • Email
  • Print

May 25, 2009 · Filed Under: BreadCrumbs · 6 Comments

Orange & Plum Miche with Two Preferments

This miche wasn’t supposed to be. Always eager for the taste of whole wheat, I had decided to make a “pan bigio” from Carol Field’s The Italian Baker, a book I have owned for quite a while and certainly not used enough as it is full of attractive recipes which I have yet to try. Most of them are yeast-based but they can and should be converted to natural starter. Maybe I’ll give it a try this summer.
Anyway I had dutifully made the biga (starter dough made from small amounts of flour, water and yeast allowed to ferment for at least 24 hours) two days before and when it had become deliciously and deliriously effervescent, I started to prepare the other ingredients for scaling.
But (why so many buts in life?), just as biga requires commercial yeast (fresh, dry active or instant) , so does the final dough for Pan bigio and, as I was reaching for it, my eyes fell on my liquid starter, forlornly bubbling away in its glass jar. As I hadn’t baked with it the day before, I actually needed to use some of it (or throw some out) to make room in the jar for its daily meal.
So I made up my mind on the spot, decided to keep the pan bigio recipe for a day when I wouldn’t have enough starter (as if that was likely to happen anytime soon) and to strike for a new (to me) frontier in bread-baking: use two preferments in the same dough (I wasn’t about to throw away the biga, as you can imagine).


I still wanted an at least partially whole-wheat bread but now that I was no longer bound by a recipe, I could give free rein to my imagination as to the other ingredients. So I gazed out of the window: looming dark clouds, misty lawn, dripping trees. It felt like fall, or maybe early spring (it was cold in the house with the heat off), and I tried to think of a flavor that would warm us up.
I closed my eyes and must have been visited by the ghost of Christmas past because, all of a sudden, I had a craving for dried plums and oranges, very little of both, just enough to give the bread a different fragrance and make it more festive. I briefly considered alternatives (mango and Brazil nuts?) but in the end, I stuck with the plum-orange flavor, which is a traditional one in French cooking and baking (although not in bread, at least not in the old days) and very pleasant in a quiet sort of way.
Since the two preferments had been made with regular bread flour, I decided to put at least 50% whole wheat flour in the final dough, and as a final treat (I love huge breads), I decided to make a very big loaf, so that I could give some to family and friends. It did come out big (1.8 kg) and fragrant, not sweet at all which is what I wanted. Too bad web-sampling hasn’t been invented yet. I’d love to have you taste it and tell me what you think…

Ingredients:
For the biga

  • 135 g unbleached all-purpose flour
  • 115 g water
  • 1/8 tsp instant dry yeast 

For the final dough

  • 445 g whole wheat flour
  • 420 g unbleached all-purpose flour
  • 390 g water
  • 250 g biga
  • 225 g liquid starter (100% hydration)
  • 50 g plump dried plums, chopped
  • 18 g salt
  • 5 g dried orange peel, soaked for 20 minutes in hot water, drained and finely chopped

Method:
For the biga

  1. At least 1 day before but preferably 2, mix yeast and flour in a small bowl and add water
  2. Stir to incorporate thoroughly, knead briefly until smooth and leave to ferment for 24 hours
  3. After 24 hours, if not using immediately, refrigerate for another day
  4. On the day of the baking, bring back to room temperature before using

For the final dough

  1. Put the biga and the starter in the bowl of the mixer and mix slowly with the paddle attachment until incorporated
  2. Add 250 g water (reserve the rest), mix again and add the flour
  3. Mix on low until well incorporated, stop the mixer, cover the bowl and let rest for 20 minutes (autolyse)
  4. Add the salt and mix on medium speed (3 on my old Rival Chef Excel) with the dough hook, adding water as needed for at least 6 minutes (depending on the flour you use you may have to use more water than I did in this recipe. I used a Hudson Valley artisanal whole wheat flour which doesn’t absorb water readily and I had to adjust for that), until the dough has achieved the right consistency (neither too firm nor too slack, one clue would be to see how well defined the edges are. If the edges are sharpish-looking, you need to add water)
  5. Give the dough the windowpane test (wet your hands, pull a piece of dough from the mass and gently turn and stretch it. If you manage to create a “window” in the dough without tearing it, it is ready)
  6. Add the fruit and orange peel
  7. Mix on low for a minute
  8. Take the dough out of the bowl, transfer it to a (lightly) flour-dusted countertop and finish incorporating the plums and orange peel by hand making sure they are evenly distributed in the dough
  9. Oil a big bowl or dough bucket and transfer the dough to it. Close the lid tightly
  10. The first fermentation should take 1 1/2 to 2 hours
  11. After that time, the dough should have at least doubled. Take it out and shape it roughly into a ball. Let it rest covered for 20 minutes
  12. Shape it into a tight boule (ball) and put it, seam down, on a semolina-dusted board. Stick the board in a big clear plastic bag. Blow once into the bag before closing it to create a dome and stick the whole thing in the refrigerator for the night (or 8 to 10 hours during the day if more convenient)
  13. In the morning, turn on the oven (450 F/232 C) after putting in it a baking stone (if using) with an empty metal pan on the rack under it
  14. Take the bread out of the refrigerator and let it rest a while at room temperature while the oven heats up (or a bit longer)
  15. Take the bread out of the bag and transfer it to a semolina-dusted parchment paper
  16. Stencil and score the loaf as desired
  17. Pour a cup of cold water in the metal pan, transfer the bread (still on the parchment paper) to the baking stone and spray some water on the walls of the oven (taking care not to aim towards the oven light) to create even more steam
  18. Close the oven door and let bake for 40 minutes
  19. After 40 minutes, open the oven to take a look at the bread. It is so big that it will not be done yet but it will probably be already brown enough. If that’s the case, remove the parchment paper, lower the oven temperature to 390 F/199 C and bake another 15 minutes
  20. Take the bread out and use an instant thermometer (insert on bottom surface) to check its internal temperature. (Mine had been put in the oven while still pretty cold and after 55 minutes, its internal temperature still hadn’t reach 200 F/93 C)

  21. If necessary, let bake another 10 minutes on 335 F/168C) until the bread’s internal temperature reaches 204 F/96 C
  22. Take the bread out of the oven and let it cool on a rack. It’ll take a while but it’s well worth the wait…

As always, the loaf has been submitted to Susan, from Wild Yeast, for her weekly Yeastpotting feature. I can’t thank Susan enough for her beautiful, instructive and fun blog and for the kindness with which she displays other bakers’ work. If you haven’t visited Wild Yeast yet, you are in for a BIG treat! Enjoy!

Share this:

  • Facebook
  • Pinterest
  • Twitter
  • Email
  • Print

May 18, 2009 · Filed Under: Breads, Breads made with starter, Recipes, Yeasted breads · 11 Comments

Apricot Loaf (80% whole wheat)


Don’t you love how, with the same recipe but a different flour, you can create a totally different bread? This loaf springs from my beloved Local Breads, by Daniel Leader, a book I return to over and over for the elegant spareness of the writing, the simplicity of the instructions and the overwhelming passion that infuses every page. If you feel like going on a bread tasting trip to Europe without leaving your kitchen or your bakery, this book is for you.
I had made Leader’s Whole Wheat Sourdough Miche and loved it (I posted about it here in my French blog) but this time, I wanted to add a hint of apricot and macadamia to the whole wheat flavor (I love how these tastes combine to create a distinctly new one). So I prepared the fruit and the nuts, and I was getting out the scales when I remembered that I had bought organic whole wheat bread flour from a small mill a few weeks ago when I took a friend from France on a tour of the Hudson valley. I decided to use it.
This flour had been stone-ground from hard red spring wheat with 100% of the wheat germ intact and I got it at Wild Hive Farm Store in Clinton Corners, New York. The store sells other flours (I bought some triticale that I have yet to try), various homemade products, including breads which didn’t appeal to me and amazingly delicious cookies which did (try the chocolate meringue and the Linzer torte, you will not be disappointed, I promise, and I don’t have a sweet tooth, so these cookies have to have been truly awesome).
From my classes at the San Francisco Baking Institute, I knew that hard red spring wheat is richer in protein than hard red winter wheat but that the quality of its protein is inferior, which means that its tolerance to long fermentation is lower and therefore that flour made from that wheat is less well suited to artisanal bread making. But Wild Hive Farm’s self-avowed mission is “to help build sustainable communities and support regional sustainable agriculture by producting food products made with the local, organic bounty of the Hudson Valley” and I had decided to help it achieve that goal by giving this high-protein flour a try.
But, boy! was I glad I paid attention at SFBI when they told us (they actually hammered it into our heads) never to start with the full amount of water called for by a recipe! Leader uses 375 g of water. I put in 283 g before I remembered to stop pouring. I figured that I would probably use the 92 g that were left over and maybe even more since this new flour would undoubtedly be very thirsty (spring wheat is supposed to have more water absorption).
But all spring wheats are obviously not created alike. This one surely didn’t act like a sponge. Even with only 283 g of water, the dough was overhydrated. I added 15 g of all-purpose flour when it became apparent that I would never be able to do anything with it if I didn’t stiffen it up a bit and with a couple of folds during the first fermentation, it turned out to be okay. However I got a very different bread from the one I had started out to make, very good actually (the flour tastes deliciously wheaty and I love the added flavor of the apricot and macadamia nuts) but definitely not a “pain Poilâne”…

Ingredients:
Whole wheat levain

  • 50 g stiff dough levain
  • 75 g water, lukewarm (70 to 78 degrees F/22 to 26 Celsius)
  • 100 g stone-ground whole wheat flour

Final dough

  • 375 g water, lukewarm  (70 to 78 degrees F/22 to 26 Celsius) (as indicated above, I ended up using only 283 g and even that was a bit too much but the exact amount will vary according to the type of flour used)
  • 100 g unbleached all-purpose flour (+ 15 g I added when it became clear the mixing wasn’t happening as it was supposed to)
  • 400 g stone-ground whole wheat flour
  • 225 g whole wheat levain
  • 10 g sea salt
  • 50 g macadamia nuts, unsalted, roughly chopped in a mortar & pestle
  • 50 g dried apricots of the soft variety, chopped with scissors
  • 10 g wheat bran, optional (Leader doesn’t call for it but I added it to try and dry out the dough a little)

Method:
Whole wheat levain

  1. Take your levain out of the refrigerator and pinch off 50 g (about the size of an Italian plum)
  2. Place the piece of levain in a wide, shallow mixing bowl and pour the water over it
  3. Use a rubber spatula to mash the levain against the sides of the bowl to break it up and soften it
  4. Add the flour and mix vigorously with one hand (holding the bowl with the other) until you get a very stiff dough. It will not be smooth
  5. Place in a 1-quart container, cover tightly and let ferment at room temperature (70 to 75 degrees F/22 to 24 C) for 8 to 12 hours
  6. When the levain is ready (it will have doubled in volume) and it is time to mix the dough, you can either mix by hand or use a mixer or in a bread machine (for this loaf I used my bread machine but I was standing over it watching the mixing like a hawk and I finished it by hand)
  7. If using a bread machine, put all the ingredients in the pan in the order prescribed by the manufacturer (with mine, the liquid ingredients go first and I had mixed the levain and part of the water in a bowl beforehand until the levain was well dissolved)
  8. Start the dough cycle and adjust the amount of water according to the dough consistency
  9. At the beep, add the fruit and nuts. Check the dough consistency again. Take the dough out as soon as the dough passes the windowpane test (pull off some dough with wet hands and gently stretch it. If you can practically see through the dough in places and it doesn’t tear, it is ready). If necessary finish incorporating the fruit and nut by hand
  10. Transfer the dough to a 2-quart bowl or dough bucket and let it ferment at room temperature for 1 hour
  11. Take it out and knead it (or fold it) briefly before returning it to the container. Cover again and leave to ferment another 2 to 3 hours (as the dough was still pretty slack, I actually gave it another fold 30 minutes after the first one)
  12. Shape into a ball and place, seam side up, in a banneton or colander, dust it with whole wheat flour and put in a big plastic bag which you close tightly after blowing once into it (it didn’t happen quite like that for me. At the end of the fermentation period, the dough looked ready but was still pretty sticky. I knew there was no way it would come gently out of a banneton after the second fermentation. So I put some parchment paper at the bottom of my trusty Lodge cast-iron Dutch oven and literally poured the dough into it. Then I firmly closed the lid of the Dutch oven and placed it in the refrigerator for the night. High-protein wheat flour isn’t really made for long fermentations but, what the heck, that was enough struggle for one day and I had a feeling the dough would make it through the night, which it did)
  13. Normally however you want to proof the miche for 2 to 3 hours until pillowy. One hour before baking, place a baking stone on the middle-rack of the oven (with a shallow metal container under it) and preheat the oven to 470 degrees F/243 C (since I was going to bake straight from the refrigerator, I didn’t preheat the oven, figuring the gradual rise in temperature inside the Dutch oven and the ensuing cloud of mist would do wonders for that dough)
  14. Score the miche (4 straight slashes about 1 inch from the edge to form a square shape frame is the standard score) (the dough was surprisingly firm when I looked in on it in the morning but still rather wet-looking. I stenciled it and scored small cuts all around, remembering, too late, that you are supposed to score a weak whole grain dough before the second fermentation and not after. I was lucky however as the dough didn’t collapse. While not athletic, it didn’t look like it was about to pull a fainting act on me, for which I was infinitely grateful)
  15. Slide the miche into the oven on the baking stone, pour a cup of water into the shallow container located under it to create mist and close the oven door for 40 to 5o minutes (adding a few minutes if necessary) (as for my loaf, it baked in the closed Dutch oven for one hour at 450 F/232 C, then I reduced the temperature to 350 F/177 C, took the loaf out of the Dutch oven and set it directly on the baking stone for another 10 minutes)
  16. Let cool completely on a rack before attacking it. The fragrance of the bread and the delicious cracking of its crust as it settles will make patience very hard to attain, so maybe now would be a good time to go to the market or go do some writing or weed the yard, anything that would prevent you from ripping a chunk out of that cooling miracle…
This loaf has been submitted to Susan, from Wild Yeast, for her weekly Yeastpotting feature.

Share this:

  • Facebook
  • Pinterest
  • Twitter
  • Email
  • Print

May 12, 2009 · Filed Under: Breads, Breads made with starter, Recipes · 5 Comments

Keith Giusto’s power bread (with sprouted grain)

This bread is one of Keith Giusto’s favorites and a big seller in his bakery, Full Circle Baking Company in Petaluma. Made with sprouted wheat, it requires some serious advance planning since you have to soak the grain for 48 hours and wash it carefully before milling and using it.
Why use sprouted wheat? Because sprouting “liberates” the sweet flavor of the kernel and, more importantly still, because it triggers the breakdown of the nutrients it contains, transforming large molecules in smaller ones more easily absorbed by the body.


Before (top) and after (bottom) sprouting

Two considerations come into play when selecting wheat for sprouting: first, it is essential to purchase clean wheat from a reliable source because dirty wheat may contain insects, mouse droppings, or worse and may also contain little stones which might find their way into the bread and from there into someone’s mouth and break a tooth (it could also seriously damage the milling machine); secondly, it is very important to purchase gluten-rich wheat (hard white winter wheat or dark Northern spring wheat) since, once sprouted and milled, it will replace a good proportion of the flour in the dough.
When getting ready to sprout (48 hours before mixing the dough), put the kernels of wheat in a big bucket or bowl (depending on how much you are sprouting) and use 180% water for 100% wheat. Agitate the seeds vigorously to make sure every kernel is in contact with water. Repeat 3 or 4 times a day. In warm weather, change the water everyday.
After 48 hours, if you press on a kernel, white matter (the endosperm) will come out. The wheat is ready. If you see even the beginning of the germ, then it is too late and the wheat cannot replace part of the flour in the dough. So watch it carefully on the second day.

The next step – washing the wheat – is extremely important. The soaking water is yellowish (or reddish) and murky and it stinks (a sign that fermentation has started). It needs to be completely rinsed out. Place the seeds in a colander (at SFBI, we used a perforated bucket) and wash. The wheat is clean when the rinsing water comes out clear and bubble-free).

Once clean and drained (at this point, you can taste it and discover its deliciously nutty flavor), the wheat is milled. A meat grinder can be used if you have one. If using a food-processor, be sure to make really small batches as the sprouted wheat is quite dense and the machine might conk out.

If not used immediately, the milled wheat needs to be kept in the refrigerator where it’ll stay good for a couple of days. Since the sprouting and milling process is rather cumbersome, it might be a good idea to make a big batch (for instance, four times the amount you need) and freeze the milled grain in 1-lb or 1-kg bags. When ready to use, be sure to thaw it well though as the mass becomes very stiff and would break the hook of the mixer if not completely thawed.
The milled grain is added to the liquid ingredients (water, levain, fruit juice if using) and the dough is mixed on 1st speed until incorporated, then the dry ingredients go in (flour, yeast, gluten if using), etc. It is particularly important not to add all of the water indicated in the formula as the milled grain retains a lot of it and the dough might be too wet.

I will not post the actual recipe today as I would need to recalculate the weight of all the ingredients for home use (at SFBI, we made 25 kg of power bread dough). But I will post it when I make the bread at home.
The loaf can be scored as follows…


…and come out like this…


Or it can be shaped and scored as Lumi, one of our classmates, prefers it…


We used stiff levain, sprouted grain, bread flour, dry yeast, salt, raisins juice, raisins and toaste walnuts and almonds in the dough.


The bread is delicious and keeps very well. At home I may try to reproduce it without the raisins (I love their sweetness but hate the calories they add to each slice) and halve the amount of nuts.
The big question though isn’t the ingredients I’ll use. As I don’t have a meat grinder, it is really whether or not I’ll be able to mill the grain in my food-processor. There is only one way to find out… Stay tuned!

Share this:

  • Facebook
  • Pinterest
  • Twitter
  • Email
  • Print

April 25, 2009 · Filed Under: Breads, Breads made with starter, Recipes · 5 Comments

SFBI – Whole Grains Workshop- Day 5

Today in a final flourish, we baked…


…power bread…


…toasted pecan and flax seed bread…
…sprouted whole wheat pan bread…
…and pavés au levain.
We posed for the “school picture” with a sampling of the week’s breads


Didier Rosada

A happy team!

SFBI’s President Michel Suas

Keith and Didier

Share this:

  • Facebook
  • Pinterest
  • Twitter
  • Email
  • Print

April 25, 2009 · Filed Under: Classes, Resources · 4 Comments

  • « Previous Page
  • 1
  • …
  • 69
  • 70
  • 71
  • 72
  • 73
  • …
  • 76
  • Next Page »

Hello!

MC-Profile- 2013 - DSC_0934

My name is MC: formerly a translator,  now a serious home baker and a blogger. If you like real bread and love to meet other bakers, you are in the right place. Come on in...

Learn more →

  • Email
  • Facebook
  • Instagram
  • Pinterest
  • RSS
  • Twitter

Don’t want to miss a post?

Subscribe to Farine via email

Archives

Categories

Copyright © 2025 Farine · Design by Design Chicky Log in