Farine

Crazy for Bread

  • Home
  • About
    • FAQ
  • Recipes
  • Resources
    • BreadCrumbs
    • Other Bread Sites
    • The Grain Gathering
  • Artisans

Search Results for: how to make bread

Pear-Chestnut Confit

Related story: Meet Solange Couve, Artisan Jam-Maker

Chestnuts are abundant in the Ardèche where they are used in a variety of dishes, some sweet and some savory, and even in bread. To make this confit, Solange uses chestnuts from her own chestnut-trees.
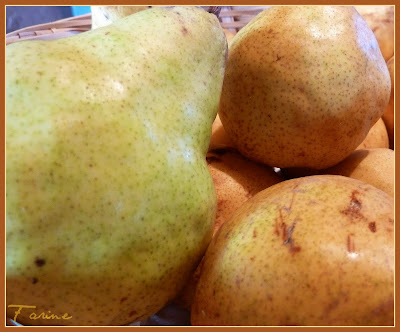
She also uses pears from her orchard (she only grows Williams pears). The ones she uses in this particular dish are the last of the season and she has saved them for the demo. 2010 hasn’t been a great year for pears: last year the pear-trees yielded a huge crop of very big pears but this year, they struggled to produce fewer and much smaller fruit. Still the pears seem marvelously fragrant and juicy to me.
For this recipe, the pears are first peeled…
… then cooked in syrup until they become translucent.

As for the chestnuts, they are cut horizontally in a circle, then boiled briefly to slightly loosen their two layers of skin. Once peeled, they are cooked in boiling water before being added to the pears. Preserved chestnuts in syrup can also be used, whether home-made or store-bought.

Solange uses a special knife to cut through the chestnuts but as demonstrated in the video below, a regular paring knife can also be used.Previously, when she was processing her chestnuts for commercial purposes, she had them peeled in the village by an artisan who uses a less labor-intensive technique: he places the chestnuts inside a rotating cylinder perforated with many small holes and uses a flame-thrower. The flames lick the outside of the cylinder, burning away most of the skins. The chestnuts are next dipped in water then placed on a rolling mat where the remaining skins are removed by hand. The perfect ones can be used whenever a recipe calls for whole chestnuts whereas the other ones are puréed and used in other recipes.
Solange says that it is best to let fresh chestnuts dry out a little as they are easier to peel if they have shrunk a little. Store-bought ones are usually somewhat dry already, so this step can be skipped. Since the skins are easier to remove when the chestnuts are hot, it is almost guaranteed to be a challenging exercise and caution is de rigueur. If one isn’t really partial to burned fingers, it is best to use chestnuts preserved in syrup as a less hazardous alternative.
Ingredients:
1 liter of water
400 g crystallized sugar
10 pears
10 big fat chestnuts (or their equivalent in broken pieces)
1 vanilla bean (from Tahiti if available)
Method:
  1. Peel and cook the chestnuts as described above. Solange cautions that the chestnuts need to be peeled while still hot as their skin starts to stick again when they cool down.
  2. Heat water in a medium-size wide and shallow pot (to facilitate evaporation) and add the sugar
  3. Slice open the vanilla bean and scrape the tiny grains into the syrup, then add the two halves of the vanilla bean to the pan
  4. While the syrup is boiling, peel and core the pears and cut them in quarters
  5. Plunge them delicately into the boiling syrup and let them simmer. Refrain from handling them as they cook. To avoid breaking them, do not flip them over
  6. When the pears are translucent, gently add the chestnuts with some of their cooking water and let the syrup thicken again
  7. Pour into jars when done. The confit will keep for a couple of weeks in the fridge. To extend its shelf life, it is imperative to sterilize the jars, a precaution that Solange takes systematically. She places all her jars in a big pot, covers them with cold water, then bring the water to a boil and lets the whole thing boil at 176°F/89°C for 15 minutes. None of her jars has ever spoiled.
Unfortunately my version of iMovie doesn’t allow me to add subtitles or I would have done so. But I can at least tell you what Solange is saying in this video clip (and please excuse my use of the French word “translucide” for “translucent” in the spoken dialogue. After two weeks of complete French immersion, I clearly had a hard time switching my aging neurones to English!).
  • When adding the pears to the syrup, make sure they are completely immersed and let them simmer
  • When preparing the chestnuts for peeling, cut through both skins all around. It is a bit hard to do but but when cut that way, both skins loosen simultaneously in boiling water.
  • Using a chestnut knife makes cutting the chestnuts in a circle a bit easier but a regular paring knife can be used as well
  • It doesn’t matter if the cut penetrates the flesh of the chestnut
  • After peeling, the chestnuts need to be cooked before they can be added to the pears
  • Add some of the chestnut cooking water to the syrup in the pear pan, so that it can thicken again without caramelizing
  • It doesn’t matter if the chestnuts crumble when added to the pears. In fact if using preserved chestnuts you probably want to break them a bit at this point.

Share this:

  • Share on Facebook (Opens in new window) Facebook
  • Share on Pinterest (Opens in new window) Pinterest
  • Share on X (Opens in new window) X
  • Email a link to a friend (Opens in new window) Email
  • Print (Opens in new window) Print

December 12, 2010 · Filed Under: Desserts & Sweets, Recipes · 3 Comments

The last two months…

…have been pretty hectic and haven’t offered me much time to bake, let alone blog about it. A week before Halloween, we embarked on a close-to-4-week-long post-retirement jaunt which took us from Amsterdam to Paris via a circuitous route (we hit Geneva, Cannes, Marseille and the Ardèche on the way) and allowed us to visit with family and friends as we never could when we were both working. We started with my in-laws and worked our way down and back up, meeting new friends, discovering along the way cousins whom we didn’t even know we had a few months back and tightening up lifelong ties with former neighbors as well as with childhood schoolmates. What a unique and joyful experience!
When we finally flew back a week before Thanksgiving, we didn’t go home but straight to the Pacific Northwest where we’ll be relocating early next year and where we spent the last three weeks trying to put together a budget and a timeline for renovating the house we just bought. We are staying with one of our sons and his family and even though my friends at Tree-Top Baking kindly brought me some of their levain and my daughter-in-law couldn’t be more gracious about sharing her kitchen and her oven, the truth of the matter is that it isn’t really possible to make artisan bread regularly when you are out and about all the time.
All this goes to explain why this blog has been mute since early October. I’ll do my best to catch up but more upheavals are in the works: while we are flying back East tomorrow, we’ll be hitting the road next week (weather-permitting) to go and spend the holidays in the Midwest with yet another one of our kids and his family. So bread-baking opportunities will alas remain few and far-between for the foreseeable future.
In October though, before we left the US, I met with a most interesting and talented young baker whom I’ll be blogging about as soon as I can put the story together and in France, I spent 24 hours with a jam-maker extraordinaire who, using the pear and chestnuts from her farm, showed me how to make a delicate “confit’ that would be a delicious addition to any holiday table, especially in the company of a buttery brioche. So please stay tuned!

Share this:

  • Share on Facebook (Opens in new window) Facebook
  • Share on Pinterest (Opens in new window) Pinterest
  • Share on X (Opens in new window) X
  • Email a link to a friend (Opens in new window) Email
  • Print (Opens in new window) Print

December 7, 2010 · Filed Under: Misc. writing · 1 Comment

Goat Cheese Foccacia with Cherries and Shallots

goat cheese focaccia

I felt I had posted enough flatbreads this summer already, so I wasn’t going to post the recipe for this foccacia for fear you guys would think I’ve gone no-knead and flatbreadish all the way! But it is simply too delicious to be kept a secret. I have to share. No way around that…
As explained in A Convenient Dough, the original recipe can be found in Healthy Breads in Five Minutes a Day by Jeff Hertzberg and Zoe Francois (a book to which I came reluctantly but which I found to be a good source of ideas and inspiration). Although it was love at first bite, I now make it with fresh goat cheese and I think it tastes even better. Try it and let me know!

goat cheese focaccia2

If you have the dough ready (I use no-knead naturally leavened whole grain pizza dough which I keep in the fridge but you can buy ready-made whole wheat pizza dough) , it’ll take you 5 minutes to chop two shallots and set them to marinate together with a fistful of dried cherries (not the sour kind) in a bit of red wine diluted with water and seasoned with salt and black pepper , another 2 or 3 to scoop out a grapefruit-size chunk of dough and flatten it as thin as possible on a parchment-paper covered sheet pan or pizza pan.

Everything gets to rest for 30 minutes (including you) while the oven heats up to 450ºF/232ºC. Then you drain the cherries and shallots (blotting them out with a paper towel if necessary), spread them on the waiting dough (pressing down the cherries), crumble fresh creamy goat cheese over the cherries and shallots, add some more salt and pepper and slide the foccacia into the oven. Twenty minutes later (during which your kitchen fills up with a complex and delicate fragrance), I guarantee you will be in tastebuds’ heaven!

Tips:

  • Don’t overdo the cherries, especially if they are really sweet (I use Stoneridge Orchards organic whole dried Montgomery cherries and find that the foccacia comes out better with more shallots than cherries)
  • If desired, paint with (just a drop of) extra virgin olive oil after baking.

This foccacia goes to Susan’s Wild Yeast for Yeastspotting.

Share this:

  • Share on Facebook (Opens in new window) Facebook
  • Share on Pinterest (Opens in new window) Pinterest
  • Share on X (Opens in new window) X
  • Email a link to a friend (Opens in new window) Email
  • Print (Opens in new window) Print

August 26, 2010 · Filed Under: Appetizers, Breads, Recipes, Yeasted breads · 5 Comments

Stenciled Miche

I know it’s been a while since I promised to do a post on stenciling. Sorry it took me so long! Time-wise I often bite more than I can chew, especially in the summer where I always think I’ll finally get to whatever I couldn’t do during the rest of the year and of course I never do. Oh, well! Better that than being idle and bored, I guess… Anyway the kids and grandkids are gone, we have a couple of quiet days left here on the river and the time for stencils has come!
Stenciling isn’t really difficult and it is a lot of fun as it makes it possible to vary and personalize the appearance of your loaves almost endlessly. If you know how to draw, you can make your own designs, you can also download an image or reproduce one you find in a book. Once you have the design, you transfer it to construction or other sturdy paper and you cut it out, just as I did for this one which I used for the Essential Sweet Perrin:
But I mostly use store-bought stencils which I find at arts & crafts stores such as Michael’s or JoAnn:


Sometimes I use cut-out shapes, as can be seen above in the blog’s title banner:
Or I use ornaments, for instance this one (found at Michael’s)…
…or even decorative odds and ends as with the Lovebird Loaf

I got the stencil below at Ikea. I think it was part of a cupcake decorating kit…
For the above miche, I used a stencil I bought in France in the kids’ section of a big stationery store. It came in a set of six and there were many more to choose from…
…but they were almost twice as expensive as the ones available in the US (sturdier too but that’s not really necessary), so I only got the fruit set.
If nothing else is available, I just use my hand as in the Double Apple Bread!

And then of course, if you want to write on your bread, you also need a set of letters. I own three or four different alphabets and I am always on the lookout for more as they are more fragile than the stencils and the letters get lost more easily. I buy them in the scrapbook section of arts & crafts stores.
When I was at SFBI last fall, the instructor who teaches German breads told me he always stenciled his breads in the last twenty minutes or so of baking: he takes the loaves out of the oven, sprays them very lightly with water, does the stenciling and puts them back to finish baking.
I do my stenciling just before sliding the loaves in the oven as I find them easier to handle when they are not hot. I do keep his technique in mind though and it has happened once or twice that my stencil got kind of washed out in the oven, either because of the amount of steam or because I hadn’t scored the bread in the right places and the dough moved differently from what I had expected. So I took the bread out, redid the stenciling and finished the baking. It worked very nicely. But for this miche, I just used my regular method.
What I do is that I wait until the proofing (the second rise) is done and the oven is ready for baking…
Then I gently transfer the dough (which is upside down in the basket) to a sheet-pan lined with semolina-dusted parchment paper, so that is now right side up. I put the stencil where I want it. Here I put it off-center and high up as I knew I needed space to write something.

Then I dust the open part of the stencil all over with flour using a small sugar shaker (make sure you use one with tiny tiny holes) …

I remove the stencil very gently (sometimes it sticks a bit and you don’t want to pull hard) and here we are…
Then I select the spot where I am going to write (and it’s best to pick the word ahead of time as some words take up a lot of room and you don’t want your letters to start climbing down the sides of your loaf).
In this instance, I chose a very short word to go with the grapes. I know we still have one month of summer left but, hey, for I figured, why not go for it and stencil my way to fall. At least this year I won’t be dragging behind as I am wont to do. 😉
Here comes the trickiest part as the letters tend to stick quite a lot (they are made for scrapbooks after all) and it is easy to mess up when you remove them (if you do, just brush off the flour, use the tiniest amount of water to freshen up the surface of the dough and start again), so if you don’t have dainty fingers (I don’t), it’s best to use tweezers.
I use these (which come from my old computer toolkit from the days when I still had a desktop and needed to open it up now and then). It has little edges which make it easier to grasp and hold the letters but I imagine regular tweezers would work too.

And that’s all there is to it. You just need to remember not to spray water directly on your bread when you put it in the oven. When baking a stenciled bread, it’s usually best to do the steaming from below using a small pan heated up with the oven in which you pour a cup of cold, hot or boiling water (every baker has his/her own opinion as to what the temperature of the water should be. I normally use cold water but for this recipe, I followed the author’s advice and used hot. Actually she says to bring the water to a boil but it was too complicated, not to mention dangerous, considering my innate clumsiness. So I used hot water from the tap).
Note that some kinds of bread do not stencil well or at all. I have never seen a stencil on a ciabatta for instance as wet dough just absorbs the flour and the design vanishes.
Now I wasn’t going to post the recipe for this bread as the post was really about stenciling and miche has never been my favorite bread but it was my first time making this particular recipe which I found in the revised and updated Amy’s Bread by Amy Scherber and Toy Kim Dupree and the miche came out so delicious that I know I will make it over and over from now on. Its taste reminded me once again that the bigger the bread the more intense the flavor.
My firm levain is naturally very tasty since it is fed a mixture of freshly milled grains which still smell like the wind over the fields they come from but some recipes showcase it more than others. This one enhances its complex and rustic fragrance in a way that almost brought tears to my eyes, such was the wave of nostalgia that suddenly swept over me.This is truly a bread from my childhood, from before I even knew how to say “bread” in my own language. For me at least, it is the perfect French peasant bread and so here is the recipe with heartfelt thanks to Amy for bringing me this Proustian moment.

Ingredients:
57 g very warm water (105 to 115º F/41 to 46ºC)
1/2 tsp active dry yeast (I used 2 g of instant yeast instead)
600 g cool water (75 to 78ºF/24 to 26ºC)
165 g firm levain (I used my regular wheat-spelt-rye levain which has an hydration rate of 60%)
635 g organic unbleached flour
200 g organic rye flour (I milled my own right before mixing)
18.5 g salt
medium cornmeal or semolina, for sprinkling
Method: (as adapted from the book)
  1. Combine the very warm water and the active dry yeast in a measuring cup and stir to dissolve the yeast. Let stand for 3 minutes (since I was using instant yeast, I skipped that part and added the yeast directly to the flour. I added the corresponding amount of water to the dough)
  2. In the bowl of an electric mixer fitted with a dough hook, combine the cool water and the levain and mix on medium-low speed for 90 seconds to break up the levain
  3. Add the flours and salt and mix on medium-low speed for 2 minutes, then scrape down the sides of the bowl, increase the speed to medium and continue mixing for another 5 minutes (since my mixer only has one speed, which is pretty low, I just kept going)
  4. Turn off the mixer, cover the bowl and let the dough rest for 10 minutes
  5. Mix again for 2 minutes at medium-low speed. The dough will not be fully developed at this point, which is what you want (in other words you stop short of a window-pane)
  6. Put the dough in an oiled bowl large enough to allow it to almost double, cover it with oiled plastic wrap and allow it to rise for 30 minutes at the end of which it will be slightly puffy and very sticky
  7. Moisten your hands with cool water or a little oil and give the dough a turn by gently folding it from the sides to the middle to de-gas it, then turn it over so that the smooth bottom side is up, cover it and let it rise again for 30 minutes
  8. Turn it again and let it rise a third time for 30 minutes. The consistency of the dough will be still soft but it should now be stronger and feel slightly springy
  9. While the dough is rising the third time, generously flour a banneton or a towel-lined colander. The dough will stick to any unfloured areas, so be sure every inch is heavily coated with flour
  10. Pour the dough out onto a lightly floured work surface and gently shape it in a round ball, keeping your hands floured or moistened so that they don’t stick to the dough. Try not to tear the skin of the dough
  11. Place the ball seam side up in the prepared banneton or colander, cover it with the oiled plastic wrap again and let it rise until it has almost doubled. This will take an hour or more depending on the temperature of the dough
  12. Thirty minutes before baking, preheat the oven t 480ºF/249ºC (with a baking stone on the second lowest shelf and an empty metal bowl on the shelf below)
  13. Sprinkle a parchment-lined half-sheet pan with cornmeal or semolina flour. When the miche is ready, remove the plastic wrap and carefully turn it upside down on the pan.
  14. Stencil the top of the miche as desired, then score the dough (for this miche, I scored in a circle around the stenciled top, then vertically all around on the sides)
  15. Open the oven and slide the miche onto the baking stone, still on its paper
  16. Quickly pour 1 cup of hot water in the metal bowl and close the oven door
  17. After 3 minutes, add another half-cup of water
  18. Check the loaf after 20 minutes, rotate it if necessary (a must for me as my oven is much hotter in the back than in the front) and remove the metal bowl from the oven, to make sure there is no residual moisture in the oven
  19. Reduce the oven temperature to 450ºF/232ºC and bake for a total of 50 to 55 minutes, until the loaf is very dark in color and sounds hollow when tapped on the bottom. The inside temperature should register at least 210ºF/99ºC
  20. Place on a wire rack and cool completely before cutting into it (it is actually best to wait 12 to 24 hours if possible as the flavor really increases as the bread rests).
  21. Enjoy!

This miche goes to Susan, from Wild Yeast for Yeastpotting.

Share this:

  • Share on Facebook (Opens in new window) Facebook
  • Share on Pinterest (Opens in new window) Pinterest
  • Share on X (Opens in new window) X
  • Email a link to a friend (Opens in new window) Email
  • Print (Opens in new window) Print

August 18, 2010 · Filed Under: Breads, Breads made with starter, Recipes, Tips · 15 Comments

Spicy Olive Oil “Cookies”

Spicy olive oil cookies
As I was waiting at Charles de Gaulle Airport last spring for my flight back home, I picked up a copy of Elle à Table (a handsome French food magazine with beautiful photos and excellent recipes) and happened about an article on Youssef Gardam, written by Clotilde Dusoulier from Chocolate & Zucchini .
Gardam is the young French entrepreneur of Moroccan descent credited with having propelled Moroccan olive oil onto the world culinary stage. His oils can be found in the best European grocery stores under the label Les Terroirs de Volubilis and, from what I understand, are also now available in the United States.
He produces three different olive oils: the fruité vert, made with green olives (sharp and spicy, delicious with salads or fish), the fruité mûr, made with olives picked when they turn purple (less pungent, perfect on pasta or vegetables) and the fruité noir, made with very ripe olives (very fragrant, ideal for pastry and delicate dishes). I would love to try all three but I have yet to see any of them in the grocery stores around where I live.
So for now I use Trader Joe’s Premium Extra Virgin Olive Oil (the one that’s sold with a little pour spout attached to the neck of the bottle). I love its flavor and consistency. I am sure it is not in the league of Gardam’s oils but, hey, we like it and we don’t need to mortgage the house to enjoy it.
Clotilde came up with a recipe which uses either fruité mûr or fruité noir. I made it with TJ’s oil and the cookies (also flavored with white wine and orange zest) turned out excellent. At least so said the Man who devoured them with gusto, feeling especially virtuous because they didn’t contain any butter or egg.
They were certainly flavorful with just the right amount of crunchiness but since I am not a huge fan of anything sweet, I decided to develop a recipe for spicy savory cookies we would both enjoy with “apéritif” (the French word for a drink before lunch or dinner).
I pretty much followed Clotilde’s recipe but skipped the sugar and added salt, freshly grated parmesan cheese, cracked black pepper and smoked Spanish paprika. The resulting “cookies” are just spicy enough with a hint of smokiness (I’m using the word “cookie” for lack of a better one: in French, I would call them “croquants” as Clotilde does because they are deliciously crunchy when you bite into them or “sablés”, the French word for shortbread, because they crumble very nicely in the mouth). They go very well with pre-dinner drinks. But I must warn you: they are quite addictive. It is hard to keep from reaching for another one…Ingredients: (I can’t tell you for how many cookies because I forgot to count them. But I had enough for two half-sheet pans and each pan must have contained 25, give or take. Clotilde makes them twice as thick and gets 25, so that sounds about right)
160 g unbleached all-purpose flour
90 g high-extraction flour (Clotilde uses “farine bise” a grade of flour which doesn’t exist in this country. I used La Milanaise’s organic sifted bread flour which contains more bran and germ than “farine bise” and is therefore more nutritious. It is hard to find here however. If you don’t have access to it or another high-extraction flour, replace the 90 g high-extraction flour by 55 g all-purpose flour and 35 g whole wheat flour. You might also try substituting it by 90 g whole-wheat pastry flour but I can’t guarantee the result as I haven’t tested it. Let me know if you give it a shot)
5 g aluminum-free baking powder
80 g freshly grated aged Parmesan cheese
80 g dry white wine
80 g fruity extra-virgin olive oil
5 g smoked Spanish paprika
1 g cracked black pepper
4 g saltMethod:

  1. Pre-heat the oven to 356ºF/180º C and place a sheet of parchment paper on a baking sheet (my oven is small and I used two half-sheet pans)
  2. In a bowl, mix the flours, the baking powder, the grated Parmesan cheese, the salt and the spices
  3. Make a well in the middle and pour in the oil and the wine
  4. Mix with a fork then knead briefly until the dough is smooth (don’t overknead)
  5. On a lightly floured surface, roll the dough out to a 0.5 cm-/0.2 inch disk (Clotilde rolls her dough out to a 2 cm-thickness, i.e. almost 0.8 inch, but I prefer thinner cookies)
  6. With a sharp knife, cut out squares or diamonds 3 cm (1.2 inch) wide and place them on the prepared sheet-pans, taking care to leave some space between them
  7. Bake for 15 minutes, then lower the oven temperature to 300ºF/150ºC and bake another 15 minutes, until the cookies are golden
  8. Repeat with the other batch as necessary
  9. Cool on a wire rack. Enjoy!
Spicy olive oil cookies 2

Share this:

  • Share on Facebook (Opens in new window) Facebook
  • Share on Pinterest (Opens in new window) Pinterest
  • Share on X (Opens in new window) X
  • Email a link to a friend (Opens in new window) Email
  • Print (Opens in new window) Print

August 17, 2010 · Filed Under: Cookies & Crackers, Recipes · 4 Comments

  • « Previous Page
  • 1
  • …
  • 41
  • 42
  • 43
  • 44
  • 45
  • …
  • 55
  • Next Page »

Hello!

MC-Profile- 2013 - DSC_0934

My name is MC: formerly a translator,  now a serious home baker and a blogger. If you like real bread and love to meet other bakers, you are in the right place. Come on in...

Learn more →

  • Email
  • Facebook
  • Instagram
  • Pinterest
  • RSS
  • Twitter

Don’t want to miss a post?

Subscribe to Farine via email

Archives

Categories

Copyright © 2026 Farine · Design by Design Chicky Log in